The Philharmonic Chorus of Madison is singing Benjamin Britten's "Hymn to St. Cecilia" this semester, and I was fortunate enough to be given the soprano solo in the 3rd movement.
Last night I brought my trusty Olympus audio recorder so I could go back and listen for things I need to work on - these things are not always evident in the heat of battle.
It actually went pretty well, though it's by no means perfect nor what I hope the finished product will sound like. I screwed up the counting in one part (you can hear the conductor correcting me), and it doesn't have the polish and panache I'd like it to have...this is probably due in large part to the fact that A) I couldn't hear a damn thing last night for some reason, and B) this solo kind of terrifies me, though I'm not sure why.
The chorus also seemed to be having serious pitch issues last night, but I was happy to hear that I was able to overcome that. I think that's the scariest thing about an a cappella solo, even with the chorus backing you up. There is no consistently in-tune instrument (ie: a piano) to keep you on pitch.
Moral of the story? SUCK IT, YOU AUTO-TUNED HACKS. Click here!

Tuesday, April 13, 2010
Wednesday, January 20, 2010


Remember how I said I hate hat-making?
Weeeeell, I might have exaggerated a little bit.
See, this past summer I made a Floppy Gathered Hat to go with my green-gold comfort gown, and it was horrible. It was a pain in the ass to make, and it didn't fit my head right even though I followed the directions exactly, and it looked horrible on me, and I just generally hated it. And of course, if I hated making THAT hat, I must hate making ALL hats.
Well, I have proven myself wrong on that count. I made the famous attifet, and today I completed my first French hood. I didn't hate it. I didn't even get angry. And I almost ALWAYS end up pissed off enough to walk away at some point in the process of making something.
I used the pattern from Margo Anderson's Tudor Lady's Wardrobe. It was altogether quite easy to put together. It ended up being rather time consuming, but this was due in part to some really fussy hand stitching that needed to be done at various points, and in larger part to having to start and stop and start over on several sections because I wasn't sure of the best way to proceed.
This pattern starts out with a crescent of plastic needlepoint canvas to create the "headband" part of the hat. This was called a "paste" back in the day. This is probably because it was originally constructed using pasteboard, which is pretty much exactly what it sounds like...layers of paper pasted together to make something like cardboard. The plastic needlepoint canvas is a better choice because, should one get caught in the rain, the hat will not be ruined because it's full of soggy, paste-y paper.
The next step is to stitch 16 gauge millinery wire around the outside of the paste, so you can bend it into shape. I actually used 16 gauge brass wire from the hardware store...there is no place in the area to get millinery wire that I'm aware of, and I'm reasonably certain a spool of wire from Ace is cheaper than a comparable length of millinery wire from someplace else. Either way, it got the job done.
The result:
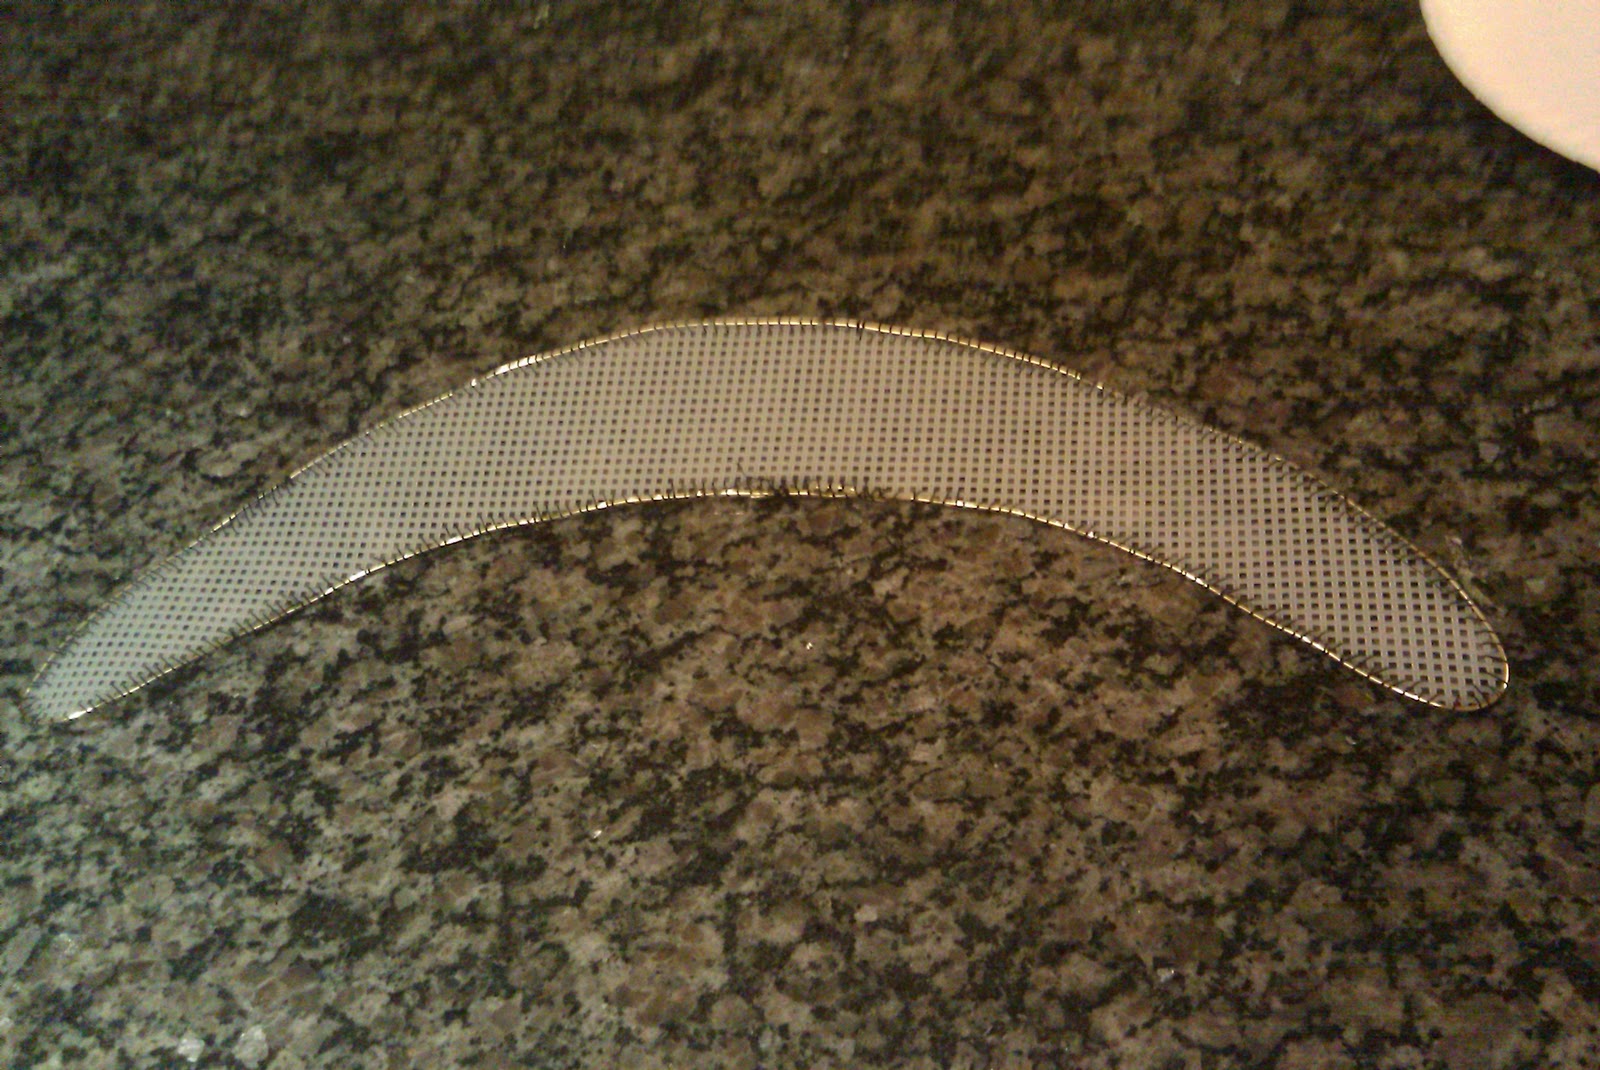
Not a particularly inspiring piece of work, but it is what it should be.
The next step is to cut out some felt in a similar shape and glue it to the paste, wrapping it around the edges. I didn't grab a picture of this, but just imagine the picture above, only wrapped in felt.
Next you sew a little crescent shaped pocket out of the fashion fabric you're using for the paste, and wrestle the paste inside. This was an interesting process. It was a VERY tight fit. I found that curving the paste into something resembling it's final shape made it a bit easier to get everything eased in. I used a "faux" silk I found at Joann's...I can't remember what it's actually made of, but it's reasonably priced and looks nice, so I went with it.
So now we have what looks like a headband.
The next part of this odyssey took me into the world of beading. French hoods were frequently ornamented with beads and jewels and things, a row on the front edge, and a row on the back. I picked up some glass pearls and seed beads and some gold filigree thingies to use. I strung them on some gold jewelry wire, and then stitched the resulting "lower bilament" on by hand. I used regular thread, but I'm going to actually go back and re-stitch it with fishing line because A) it's clear and B) it's stronger and C) it'll make me feel better on a couple different levels.

Most paintings of French hoods, as you will see if you click the link I put up at the top of this post, have a ruffle at the front. This was either attached directly to the hood, or it was attached to a coif (a tight fitting linen cap) that was worn underneath the hood. For my purposes, I attached the ruffle directly to the hood.
Now, according to the instructions with the pattern, I was supposed to take some gold organza ribbon and cartridge pleat it, and then steam it and pin it to the ironing board to dry so it would hold it's cartridge-pleat-y shape, and THEN sew it onto the hood. I said, "To hell with cartridge pleating" and improvised. I found some nice wired organza ribbon and played around with that until I found a solution that worked quite nicely.
I cut a 45" length of ribbon, and pulled the wire out of one side. I wrapped the wire up carefully and set it aside, just in case. I took the side of the ribbon that still had the wire in it and box pleated it. Then I used the wire I pulled out of the other side like thread (good thing I saved it), and sewed the pleats into place. The effect looks pretty much exactly like what the cartridge pleats would have, with a lot less work. Then I undertook the joyous task of stitching the ribbon to the inside of the hood. That was interesting. There may have bee bleeding from needle stabs.

The end result is very pretty.
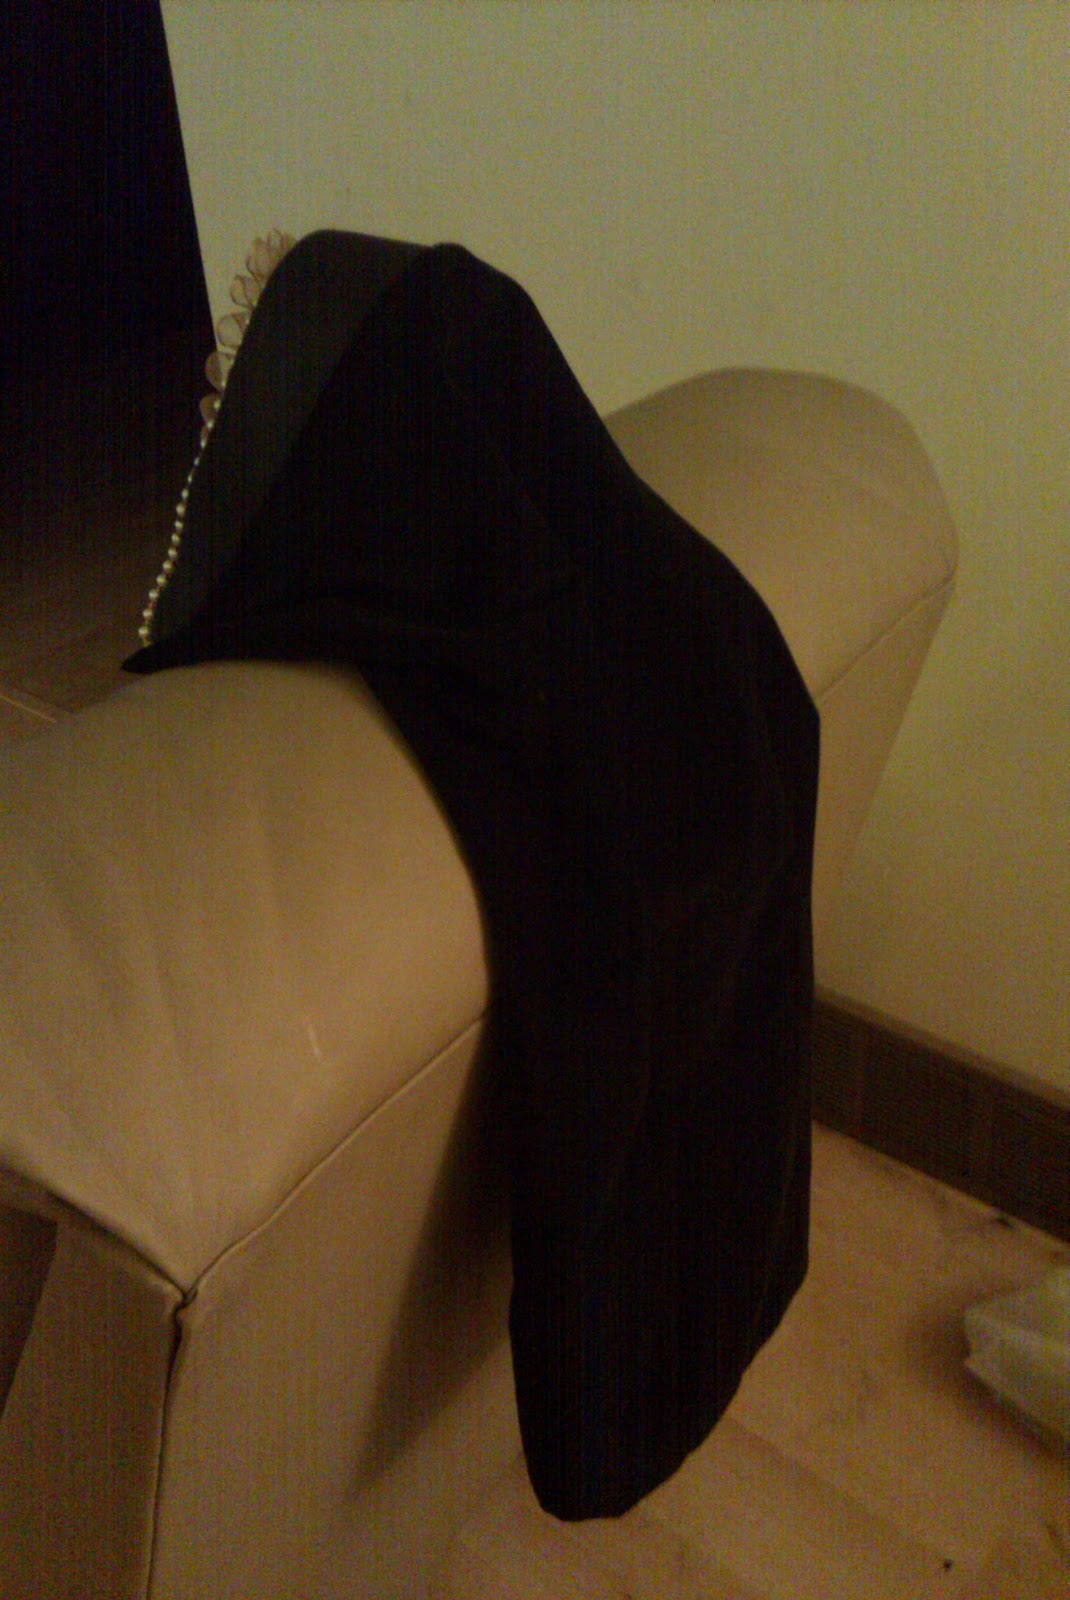
Next I undertook the veil. The pattern instructions state that it would appear that velvet was almost invariably used for the veil, and I didn't have any other black fabric to use that wasn't the same as the fashion fabric, so I sucked it up and bought some cotton velveteen. Luckily, I only needed a 26" x 26" square of it, so I have left overs for other projects. I also cut the same size square of the faux silk to use as the lining for the veil.
Different sources say different things about the shape of the veil...some say rectangular, some say half-circles. The pattern I have says the veil is actually a tube, and this makes sense because it would completely cover the hair, which was kind of a "thing" back then.
Through several interesting maneuvers, I turned these squares of fabric into a tube, with a 5" long slit at the seam on one end. This slit's function is to make room for your head. Once I got the hat totally finished, I realized that 5" is the perfect size to help keep the hat on your head. It comes up right against the back of your head and helps to counter-balance the weight and admittedly awkward shape of the hat so that I was able to wear it around without anchoring it in any way. Now, if I were wearing it all day at the Faire I would probably come up with some method of anchoring it, but as it was, it worked fine. I digress.
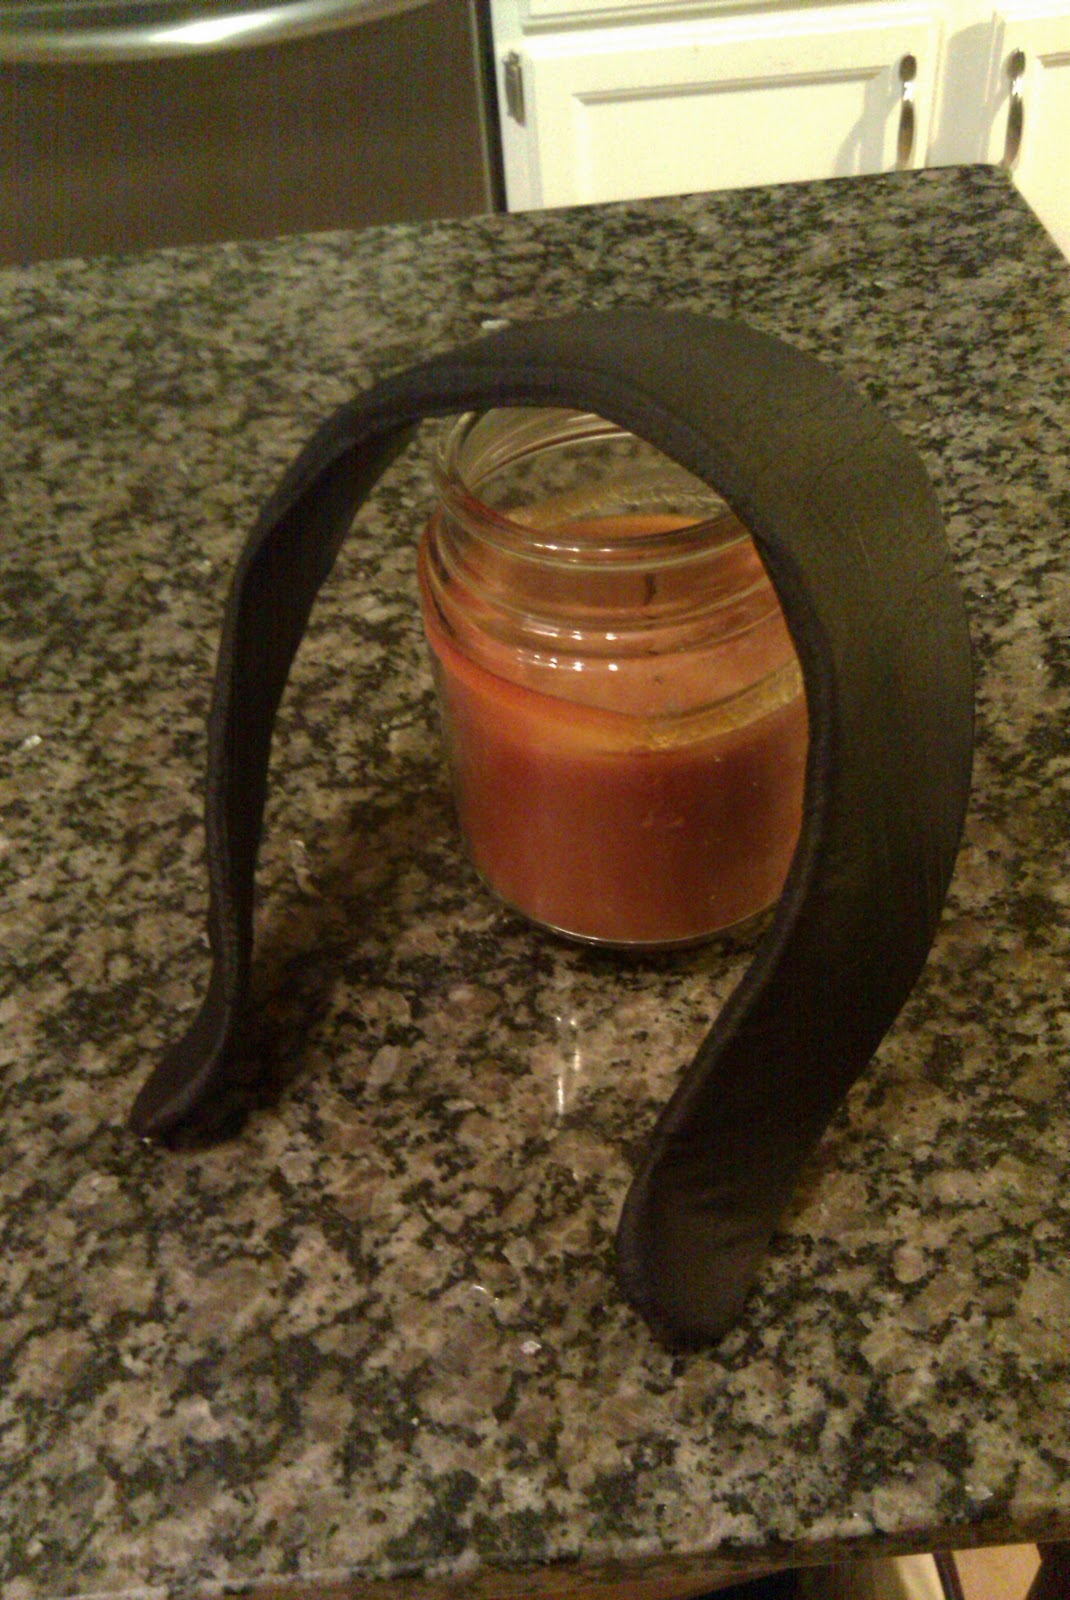
There are some sources that say that the veil was sewn onto the inside back edge of the paste. Margo's instructions have you sewing it to the outside of the paste, and actually the veil overlaps the back edge of it by about 1/2".
The dark black fabric is the velveteen veil, and the lighter black is the paste. There were some major starts and stops at this stage as well, since I really wanted to try and keep the stitches as invisible as possible and found this challenging with the curvy shape of the paste.
The final step was to attached the "upper bilament". This was just another string of pearls and beads, but a little more fancy than the lower bilament. That was a fairly uneventful process, and the end result is this:
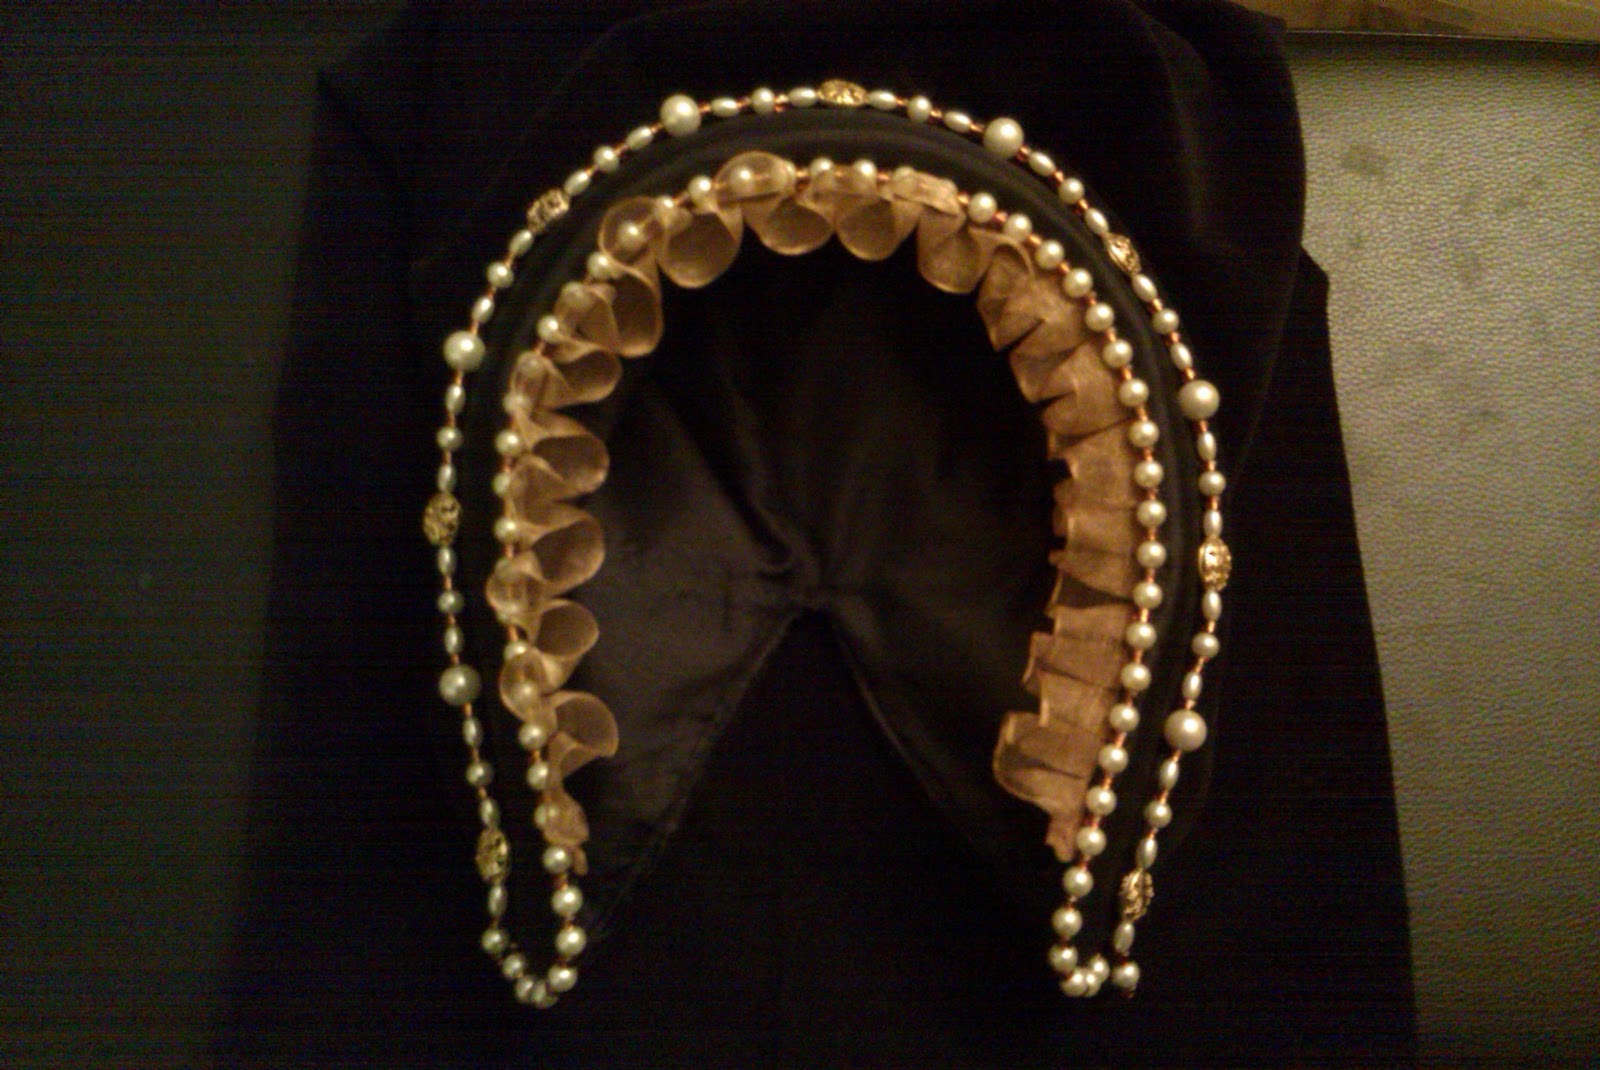
It's a surprisingly flattering style of hat. I'll post some pictures of it on sometime in the not-too-distant future. I couldn't get a satisfactory shot of it tonight. This will be the first hat I post for sale in my Etsy shop!
Now that I have one under my belt, I imagine that subsequent iterations won't take nearly as much time to construct as this one did.
Saturday, January 16, 2010
ATTIFET! Part Deux
Earlier this week I went on a pilgrimage to Janesville in order that I might acquire some additional materials, for Etsy shop merchandise as well as to finish off my attifet.
I found some nice ivory chiffon at Hobby Lobby for 50% off, which was awesome. I also found THE perfect lace. I wanted something simple, but everything else I'd seen looked like it was made from cotton thread and I wanted something a little more upscale.
I cut the chiffon to exactly 1 yard square and hemmed all the edges. That was a joy. There was spray starch involved. Also, were you aware that chiffon is the World's Most Perfect Dog Hair Magnet? It totally is. Especially when it's ivory chiffon and you have black dogs with tons of really long hair. That's your Fun Fact for the day.
Then I went through the laborious process of pinning the lace all way the way around, and mitering all the edges. I lined up the bottom of the lace to just cover the hem stitching, and then machine stitched the lace on. The texture of the lace hides the stitches that hold it on, and the lace itself hides the hem stitches, so it looks altogether quite seamless.
The machine did get a little wonky in several parts as I was sewing the lace on. There were spots where the lace slipped up and the hem stitches showed, which also made the lace edge uneven. So I had to pick out the stitches in those spots and set everything to rights. That was a little time consuming. Eh.
Once that was all done, I lined up one corner of the chiffon veil with the pointed brim of the hat and pinned it in place about 1/2" from the edge. Then I pinned it down along the brim on both sides, down to where the brim meets the rest of the hat. I hand stitched the veil in place, with a tiny stitch through the lace. I fed the needle down in between the two layers of the brim and poked it back up about an inch from the previous stitch, rinse, repeat. That made it so that the veil is securely attached, but there aren't any stitches showing on the inside of the brim. Nice and neat.
And so, without further ado, the long-awaited and much fabled attifet!


So that's done. I bought a little extra lace, and pinned it on the front of the brim, but I didn't like the way it looked...too busy. I thought about putting some pearl beading on there, but decided against that as well. I'm just going to leave it plain. This outfit isn't a noble's outfit. It's more upper class/gentry, so I don't want things too ornamented.
I sewed a plastic hair comb to the inside of the hat to help hold it on, but I quickly realized that this particular piece of headgear is going to require some really specific hair treatment to stay on. I'm not sure if that's just the nature of the beast, or if there is something I could have done to make it fit better.
I will be putting together another one of these in the not too distant future to list in my hopefully soon to be opened Etsy shop.
Monday, January 11, 2010
ATTIFET!
Firstly, allow me to apologize once again for not posting in 2935879384 years. Holidays, busy, blah blah blah. I haven't been doing much crafting of note anyway.
As you may recall, the hat I made to wear with my green-gold surcoat was evil and had to die. What I really wanted was an attifet, but I couldn't find a pattern for one ANYWHERE. I have been able to find free instructions on how to make pretty much any hat from the Renaissance, but I couldn't find attifet instructions to save my life.
My friend Peggy was able to save the day, however. She has an attifet pattern, and she was kind enough to lend it to me. She has been very patient, because she gave it to me in June, I've seen her twice since then, and I've only just gotten to the finishing stage. I did a mock-up right off the bat, and got the fashion fabric all cut out, but then I ended up putting it aside for various reasons and only just came back to it.
This pattern is pretty straight-forward in all honesty. It only involves 3 pattern pieces...a large circle, a band (you cut two), and a triangle-ish piece which forms the brim (you cut two of these as well). You stick some wire in the brim and there you have it.
Of COURSE I didn't take progress pictures because I never remember to take progress pictures because I am lame. I did, however, take pictures of the hat once it was constructed:


Pretty snazzy, huh? The last touch will be a square yard of some light, lovely fabric trimmed in lace fastened on to be a veil, like this:

I think I will also do something along the edge of the brim...maybe not lace; perhaps some pearls or something.
I have decided that, in order to keep myself busy and to try and make a little money during this period of "Funemployment", I'm going to start an Etsy shop. I'm going try and sell some nice Elizabethan purses and pouches and hats and things. Maybe some smocks and shirts. I don't know if I'm going to get crazy enough to try actual garb...in any event, it'll have me doing something more productive that sitting on the couch, messing around on the laptop and watch Star Trek. :)
Tomorrow I'm going to the fabric store to supplement the supply of stuff I have on hand and start getting some stuff listed. I'm hoping to have a handful of items by the end of the week. Then we'll see what happens.
Thursday, November 5, 2009
Shame on me!
It has been seven weeks since my last blog update. However, this does not mean that I have been idle on the crafting front.
When we last left our heroine, she was frantically getting her ass together for a trip to the Minnesota Renaissance Festival. She had successfully constructed a lovely shirt for her good husband, and had gotten the wool for his Great Kilt trimmed and the ends hemmed (although I don't remember if I mentioned that or not).
In the process of doing this, that or the other, however, I did start running out of time for my own garb. As you may recall, I bought a couple of brown herringbone patterned tablecloths on clearance at Shopko and had a grand plans to make myself some kind of working class Tudor-ish-era gown out of it. I also had grand plans to make myself a new smock. The one I have has narrow sleeves, for wearing underneath the fitted sleeves on my comfort gown, and I really would have liked something with puffier sleeves to wear with my working class kirtle. I'll tell you right now that I ran out of time to even think about that, let alone pick out and order fabric for it.
So with two days left before we had to leave the Great State of Wisconsin for this trip, I started my gown. I used the custom corset pattern generator from the Elizabethan Costuming Page, and had Justin take my measurements. I punched them all in and drafted up the pattern, fully expecting it to work as perfectly as it did when I made Darcy's gown.
Well, it didn't.
I used the pattern to make up a quick mock-up to make sure that everything was going to work, but it looked like hell. It didn't fit at all. I didn't even know what to do to make it work. I guess the measurements Justin took were inaccurate because it was WAY too big. And since I don't have a dress form or anything, I had no way of working with it to fit it and trim off the excess. So I trashed it. This was at about 11 p.m. on Wednesday. We were leaving for Minneapolis directly from work on Friday evening. This meant I had ONE NIGHT to figure something out. Awesome.
I really didn't want to wear my comfort gown. But I didn't have any means of making myself something else with any guarantee that it would fit. But then, in the middle of the day on Thursday, I was struck with inspiration!
I had this other costume, a completely historically inaccurate number made from a commercial pattern. I ganked this particular outfit from The Malthouse Theatre - Home of the Haylofters in Burlington, Wisconsin (with permission, of course). I wore it to Bristol last year and it did the job.

Isn't it awful?
However, the most important feature of this particular outfit is that it had a bodice that fit! Of course, it was made with darts which was not a technique that was used in that time period, but the end result was a garment that fit more or less the way it was supposed to. So I thought, if I deconstruct this, trim a 1/2" or so off the sides, and use this as the bodice pattern, I MAY end up with something I can work with!
Luckily for me, the shoulder straps just tied together at the top, so that was easy enough to deal with. There was some significant seam rippage going on for the rest of it, though. There were tabs at the bottom that had to come off, and several layers of fabric that were serged together so picking out the seams was fairly time consuming.
The front piece was good to go as-is, once I had it detached from the back piece. I just trimmed about 1/2" from the side to give myself some lacing room and that was done. The back I actually cut in half and trimmed 1/2" from the side and the center-back of that piece. The plan was to place both pieces on the fold of the fabric so I would have one continuous back piece and one continuous front piece, with lacing on both sides.
I had already made the decision that I was going to use a double layer of heavy cotton canvas to interline the bodice of this gown. The idea behind this is that the canvas would offer support without having to deal with boning...and at 9 p.m. on Thursday night I did NOT have time to deal with boning. That turned out to be a good decision.
I sewed the two back pieces of canvas together, and repeated the process with the front pieces of canvas. I had some duct ties left over from the boning in Darcy's bodice, so I cut four bones to put at the sides of both pieces, to reinforce the area where the gown would be laced. Once the boning was in, I very carefully sewed the canvas interlining to the dress fabric pieces that would go on the INSIDE of the bodice. This would keep the interlining from sliding around, and since it's on the inside, no machine stitching shows. Then I sewed the outside layer of dress fabric and turned the whole mess right side out. The end result was a front piece and a back piece with the brown dress fabric on the outside, and the canvas and boning sandwiched in the middle. Added bonus - all the seams were inside. Perfect.
To make sure that everything was going to fit properly, I tackled the eyelet holes right away. I positioned the holes for spiral lacing and got those made with the help of my handy-dandy awl, which I love with all my heart. I didn't bother with doing any stitching on these just yet. I used some kind of awesome linen cording I picked up in the drapery department at JoAnn. It's grey so it's not real pretty BUT this was a working class gown anyway and it works a hell of a lot better than ribbon.
I got the bodice laced on and imagine my delight when it fit like a glove. The gaps on the side might have been a LITTLE bit bigger than stricly proper, but I didn't much care about that. Once it was laced on I was able to, with some difficulty, get the shoulder straps pinned to the right length. The whole thing came off and stitched those puppies down with a quickness. I didn't take the time to finish the shoulder seams at all; it wasn't really necessary to make the gown wearable and I needed to move on to the skirt.
I put the bodice back on and laced it up, and then had Justin measure from the bottom of the bodice to the floor in the front, at the side, and in the back. I have a big butt so the back measurement was slightly shorter than the front, but whatever. Once I had that measurement, I took off about an inch and decided that was going to be the length of my skirt.
At this moment I decided that using a tablecloth for this was the best decision I had ever made in my life. The tablecloths were quite wide, and the edges were already finished. I had already cut into both tablecloths for the bodice - front piece and back piece out of each one - with the idea that this would leave the most length on each cloth for the skirt. It worked out every bit as well as I'd hoped. I measured from the un-cut end of the tablecloths and cut them at the proper length. I then sewed the sides together to make a tube. I left about six inches at the top of each side seam unsewn to give myself enough room to actually get into the thing. Hemmed edges = no seam finishing necessary! Woo hoo!
At this point I was feeling like I was pretty much home free...all I needed to do was attach the skirt to the bodice and I was good to go. I gathered the skirt to the bodice all the way around. I attached the skirt ONLY to the outside layer of the bodice, with the idea that I would hand-stitch the inside to enclose all the raw edges. I made several passes to make sure that the seam was strong and wouldn't rip out if I tripped all over myself or something.
Once that was done, I had a wearable gown. It was by no means FINISHED...I didn't sew any of the eyelets, the shoulder seams weren't finished, and the inside lining of the bodice wasn't attached to the skirt. However, it was WEARABLE, and that was the point! I ran upstairs to try on the entire ensemble. I threw on the smock and put the gown over it. I stole a brown leather belt from my husband and wrestled with the arisaid. That took some time but I finally got it right. I used a safety pin to attach it to my shoulder and had a look in the mirror. IT WAS FULL OF WIN AND AWESOME.
My research has informed me that married Scottish women in this time period wore a kertch, which was a one-yard square of fine white linen (usually given to the bride by her mother on her wedding day - she wore it for the first time when she got up the day after her wedding), which was folding into a triangle and wrapped around the head like a babushka. I had enough of the handkerchief weight linen from Justin's shirt left over, so I used that to make my kertch, and so I had put this together a couple of days prior to the Great Gown Adventure. It took some practice to get it on right, but it ultimately looked awesome.
And so it was that I had an awesome new outfit to wear to the Ren Fest. You can't even tell that it was made from a tablecloth. I got lots of compliments, and mad ups to Peggy for helping me lace into the damn thing. :) When I started this project on Thursday night I really expected that this would be a one-time-wear piece of garb, since I was flying by the seat of my pants when I made it. I am very pleased to say that this is going to be going into regular rotation because it turned out so well. Also? I didn't finish the eyelets on this before I wore it for the first time, and it was laced TIGHT. I did not expect the holes to hold up, but they totally did! No ripping, no stretching, no nothing. I'm actually not sure how that happened.
Here are some pictures of the finished product - I didn't get any pictures of the process because I was in such a damn hurry.


Cleavage rating in this gown: 10 out 10. Amazing.

It was also incredibly comfortable, believe it or not. Even though the fabric was a cotton/synthetic blend (though admittedly more cotton than synthetic - 65% cotton), it was light and comfy. And even though the arisaid fabric looks really heavy, it's actually extremely light. It's not woven very tightly, in all actuality, so the additional layer didn't cause me any discomfort at all.
Remember how in that post about the arisaid I talked about how you could use it to keep crap in? WELL. We were not very far into the day when we realized that the belt we brought for Justin was NOT going to work to hold his kilt up. He wasn't not having a lot of fun because he had to keep hiking the thing up. So we stopped in this random leather shop, the name of which escapes me unfortunately, and imagine our pleasant surprise when we found they had some super nice leather belts for $25! Normally that kind of thing, even a plain one with no buckle and no embellishment like what we got, is going to run you $50 or better at a Faire. So we snatched that puppy up. The dude at the store showed us how to fasten it, and then Peggy and I took Justin off to the side to try and get the new belt on and the old belt off without making him drop trow. AND we succeeded.
Now, we didn't want to ditch the other belt, because it's actually pretty awesome and will work well for other outfits. Brad helped Justin make it last year for Bristol. So I put that bad boy in my arisaid and I didn't even know it was there the rest of the day. AWESOME.
And because I know you're dying to see how awesome Justin's outfit was:


It was wicked hot that day. Like UNGODLY hot. I was so glad I wasn't wearing my comfort gown because I would have died. But Justin, who is more susceptible to heat than anyone else I know (due to the fact that he doesn't sweat - true story), was completely comfortable all day. Yeah for natural fabrics!

Sunday, September 13, 2009
In which I make an Elizabethan gentleman's shirt.
In order for Justin to rock a kilt at the Minnesota Renaissance Festival this coming weekend, he was going to need a shirt. So I bought some 100% linen, handkerchief weight, with which to make it. I picked up four yards of ivory linen from Denver Fabrics for $9.50/yard. They only had ivory, not pure white. Now, when they said "ivory" I assumed they meant "off-white", and I wasn't totally thrilled about that, but it was about $4/yard cheaper than I had seen anywhere else online, and none of the local fabric stores seem to carry that weight of linen, so I went for it. Imagine my surprise when I opened the package and saw that it was as white as I would have expected it to be had I actually ordered it in "white".
I used Margo Anderson's Elizabethan Gentleman's Pattern for the shirt, and it worked really well. Because the body of the shirt is comprised of just one loooooong rectangle with a horizontal and vertical slash to make the head hole, it require the use of neck gussets. These are basically triangles stuck in the ends of the horizontal slash to make the head hole more rounded. These are also an enormous pain in my ass. I actually had to go back and rip out some stitches, which pissed me off, because the weave on the fabric is so fine that the needle totally leaves giant holes. Oh well. Hopefully the kilt will cover that part when it's all pinned up.
All-in-all, the process of making the shirt wasn't really that much different from making my smock, with the notable exception of the high-necked collar. But setting the sleeves and everything was the same, and it went together quite easily.
Going into this project, I really wanted to change the way I finished the seams. I don't own a serger, and I don't feel confident that using pinking shears and reinforcing with a zig-zag stitch is going to prevent a really fray-prone fabric like linen from unraveling during washing or even general use. Reading through the manual for the shirt, Margo talked about a period technique of seam finishing called "run-and-fell" seams. Basically, you sew your seam as usual. You take one of the two resulting seam allowances, and trim it down to about 1/8"-1/4" from the actual seam. Take the longer remaining seam allowance, fold it over, and fold it over again, enclosing all the raw edges, and stitch it down.
This is all very well and good if you're going to be hand-stitching everything, but I don't have the time or the inclination to do that, so if I followed the instructions exactly, I'd end up with visible machine stitching on the outside of the shirt in several places. Hems are one thing, but I don't want a line of machine stitches going down the side or up the sleeve. So I decided to modify that method just a bit. I followed the instructions exactly right up to the end, and then instead of stitching the enclosed seam DOWN, I machine stitched it to itself. It actually worked really, really well. This is what it looked like when it was done:

Very neat, very tidy, and very fray-proof. It had the added bonus of not being terribly time-consuming, so that was good.
Here's a closer view:

There was a lot of gathering to be done on this particular garment. There are gathers located at the cuffs, and around the neckline in front and in back. I discovered that the easiest way to deal with gathering, for me, is to lengthen the stitch on the machine to as long as possible, but leave the tension at it's normal spot. Then just use your fingers to hold the fabric down as it's coming out of the machine (instead of feeding out and away from the machine on it's own), and the machine will actually do most of the gathering work for you. So that process ended up being much easier than previous attempts at gathering.


We wanted it to be a little more rustic-ish, so I made ties to go at the neckline rather than using buttons or hook-and-eye closures. It turned out pretty well, although the ties were a complete pain in the ass to make. Note to self - if I decide to make myself a partlet or high-necked smock at some point, use ribbon for ties instead of making my own.
There was a minimal amount of hand-stitching required on this garment - I had to hand-stitch the inside of the collar and the inside of the cuffs. Otherwise I was able to do machine-stitching on everything, which makes life so much better.

And so, now that you've seen all the various components, here's the finished product in it's entirety:

I can't wait to see the whole get-up put together!
In other news, the Tudor Ladies Wardrobe Pattern by Margo Anderson HAS NOT SHIPPED YET. Does this mean that I have abandoned my dreams of making a brown kirtle made from brown table cloths purchased from Shopko on clearance? HELL NO. Because I have come up with Plan B.
I will be utilizing this custom corset generator and accompanying alteration instructions to make myself a kirtle not unlike the one that I made for my friend Darcy (pics and info to follow). Darcy's laced up the front, though, and I plan on making this one lace up the side-back, as per these instructions. I'm thinking that I'm going to knife-pleat the skirt, rather than gathering. I toyed with the idea of having it lace up both sides, but that's going to be a lot of extra eyelets to sew, and I don't have the time. So we'll just stick with a one-sided closure on this one.
Before I can start though, I need Justin to get home from his mom's house so he can take my measurements to put into the corset generator, and I need to buy some nice heavy canvas. I'm going to use, like, two layers of heavy cotton canvas to interline the bodice to make it more supportive. I'm debating boning right now...I'll put in some plastic zip ties where it's going to lace up, but otherwise I think I might just leave it un-boned for now. Maybe I should do a layer of interfacing between the two layers of canvas to give things a little extra oomph...it won't breathe very well, I suppose, but great cleavage is worth the sacrifice as far as I'm concerned.
Subscribe to:
Posts (Atom)